Turtle Instructions
BACK: Turtle Table of Contents
1. Visit Microsft MakeCode for micro::bit
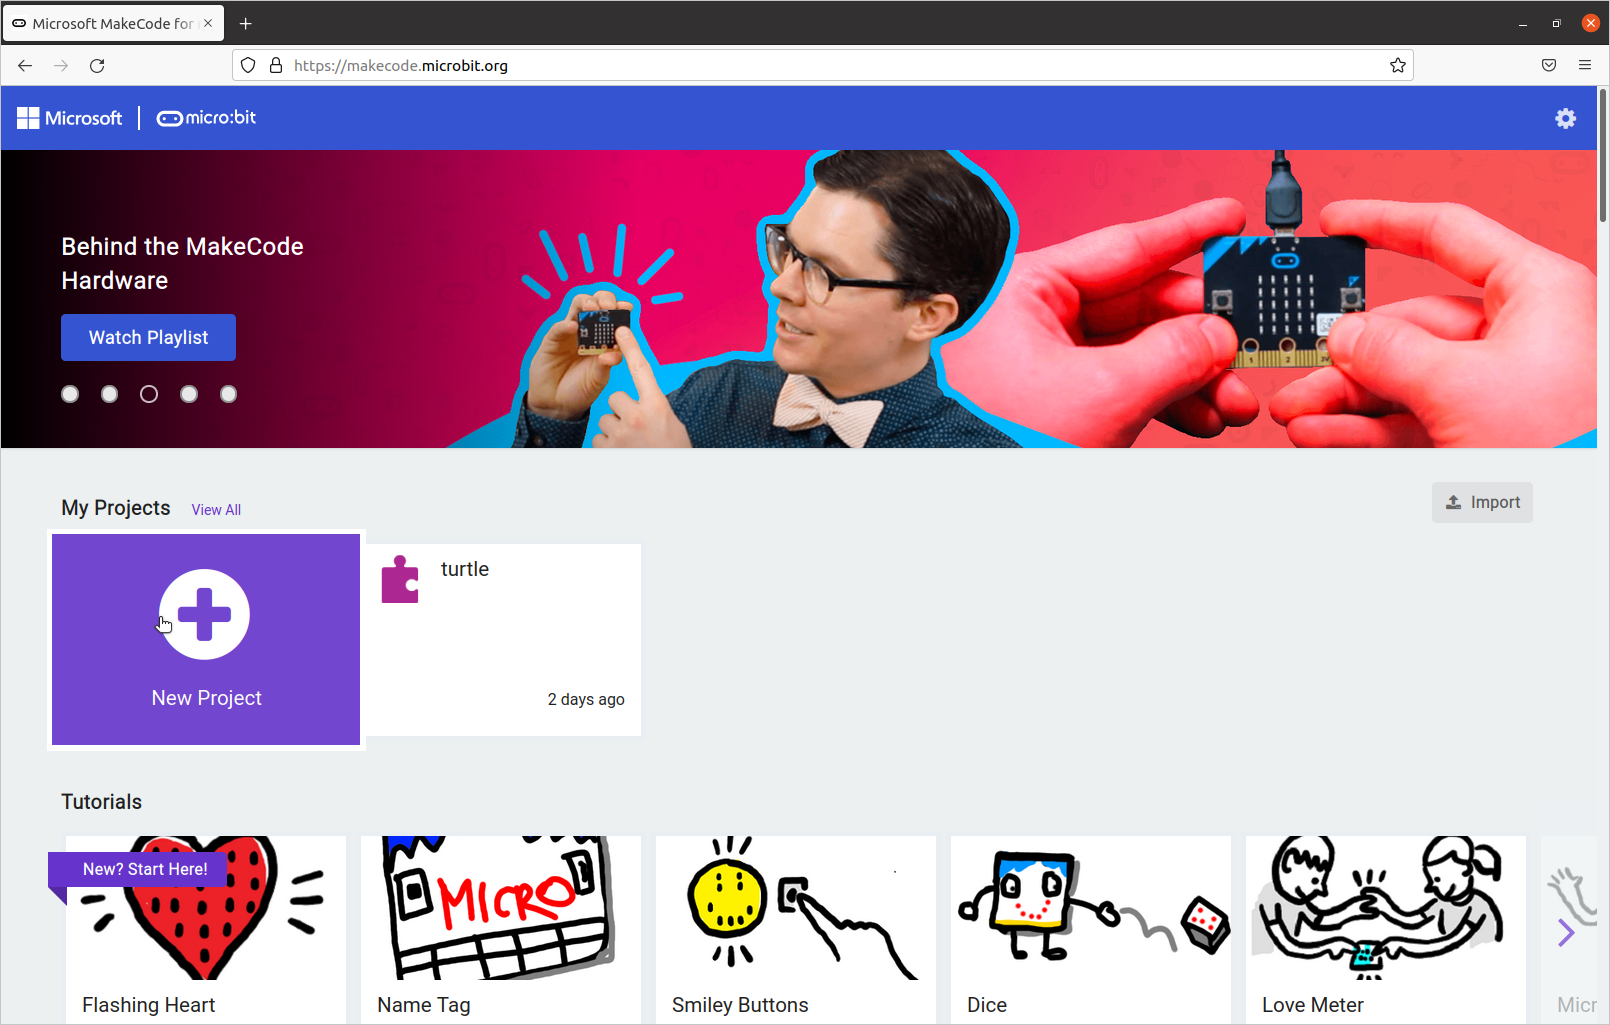 The site, https://makecode.microbit.org/, is used as a block-based interface for coding purposes. We can flash code directly onto the micro:bit using this environment. All of your projects will show up here. Create a new project.
2. Import Custom Turtle Package
Turtles won’t work right out of the box from micro:bit. You will need to import an extension. Under “Advanced,” click on the “+ Extensions” button.
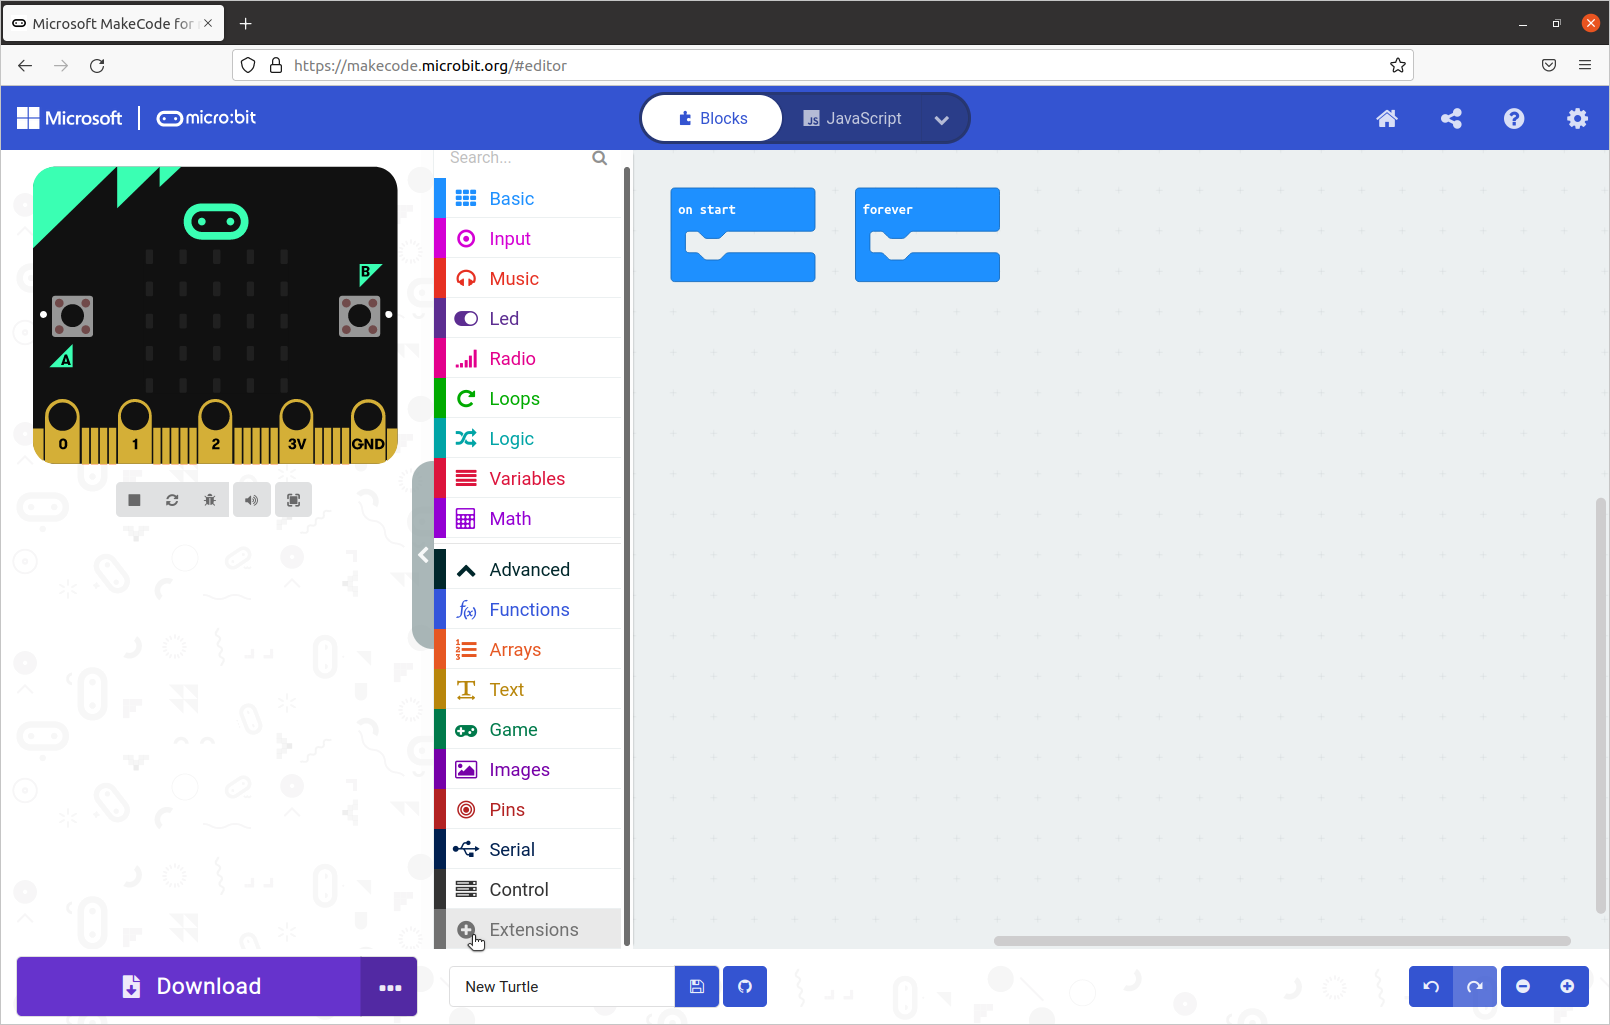
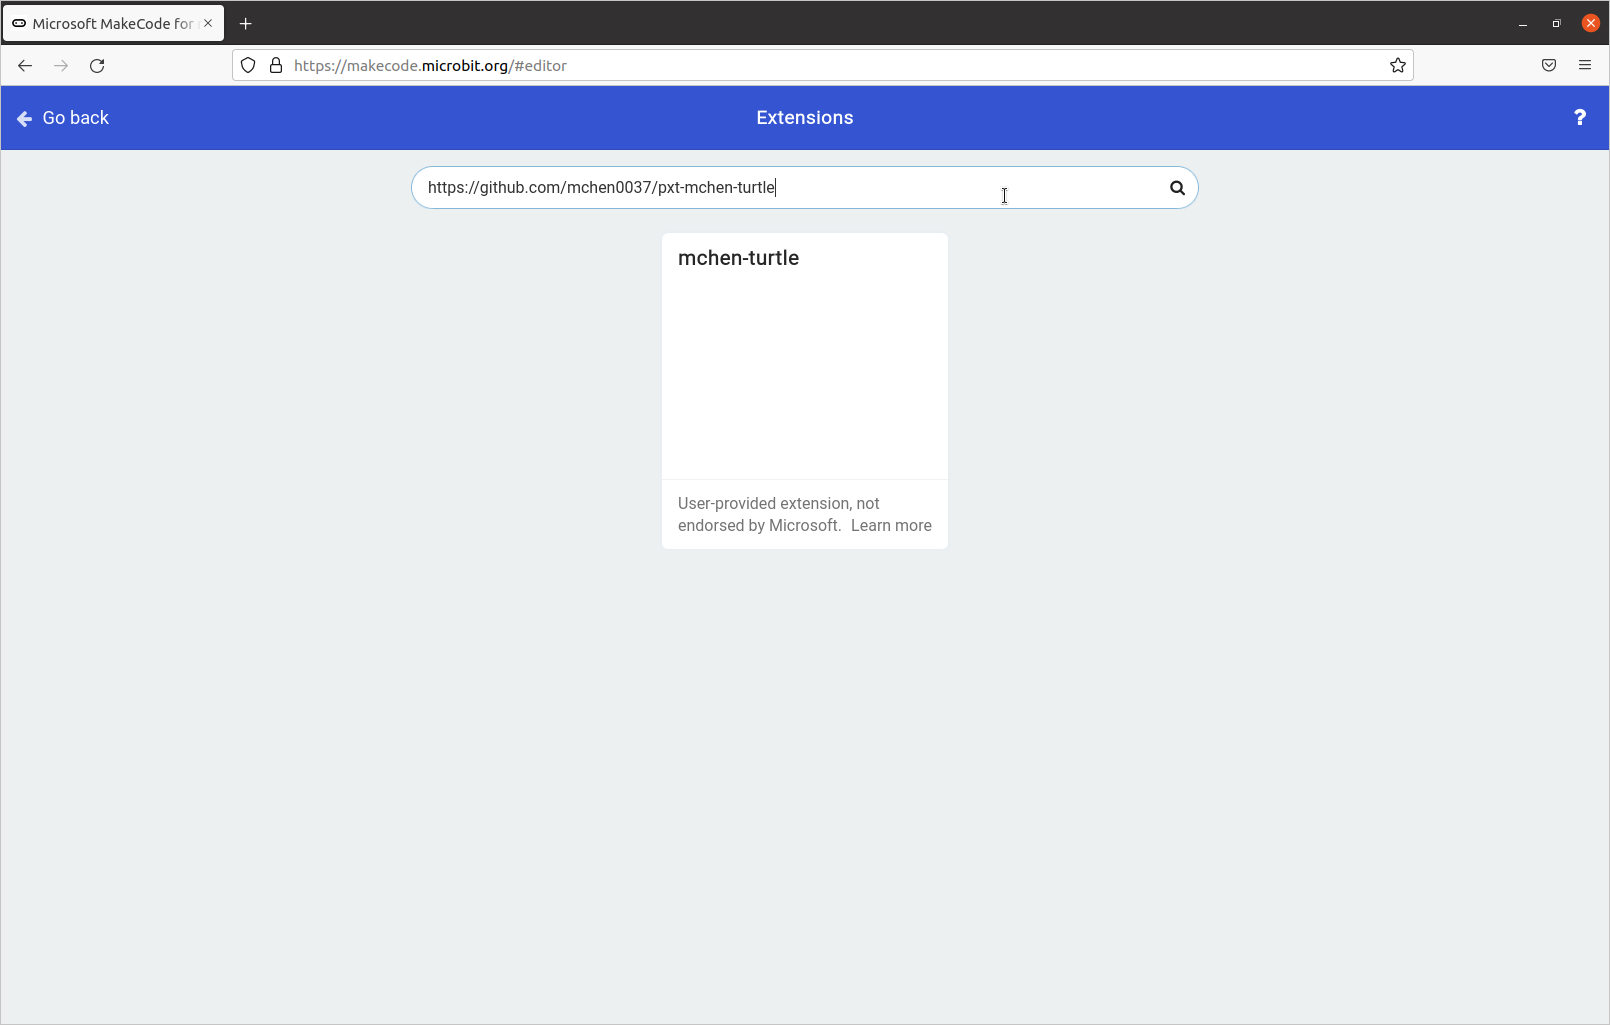
You will see several extensions here, but you will be inputting a link into the search bar above. Paste in the following link into the search bar and hit enter:
https://github.com/mchen0037/pxt-mchen-turtle
You will get the following warning message:
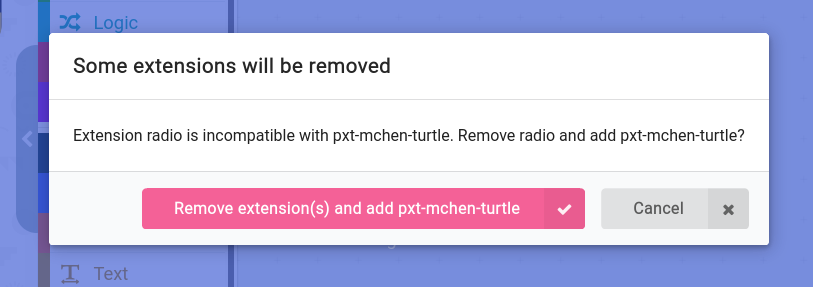 Since the micro:bit’s Bluetooth feature is incompatible with its default radio feature, it will verify that you want to do this. Click on “Remove extension(s) and add pxt-mchen-turtle.”
3. Code & Flashing the micro:bit
Congrats! You can now code the Turtle robot using micro:bit code. The micro:bit will display “hi” as a sign of life that you imported the Turtle package correctly. The following code will make a square:
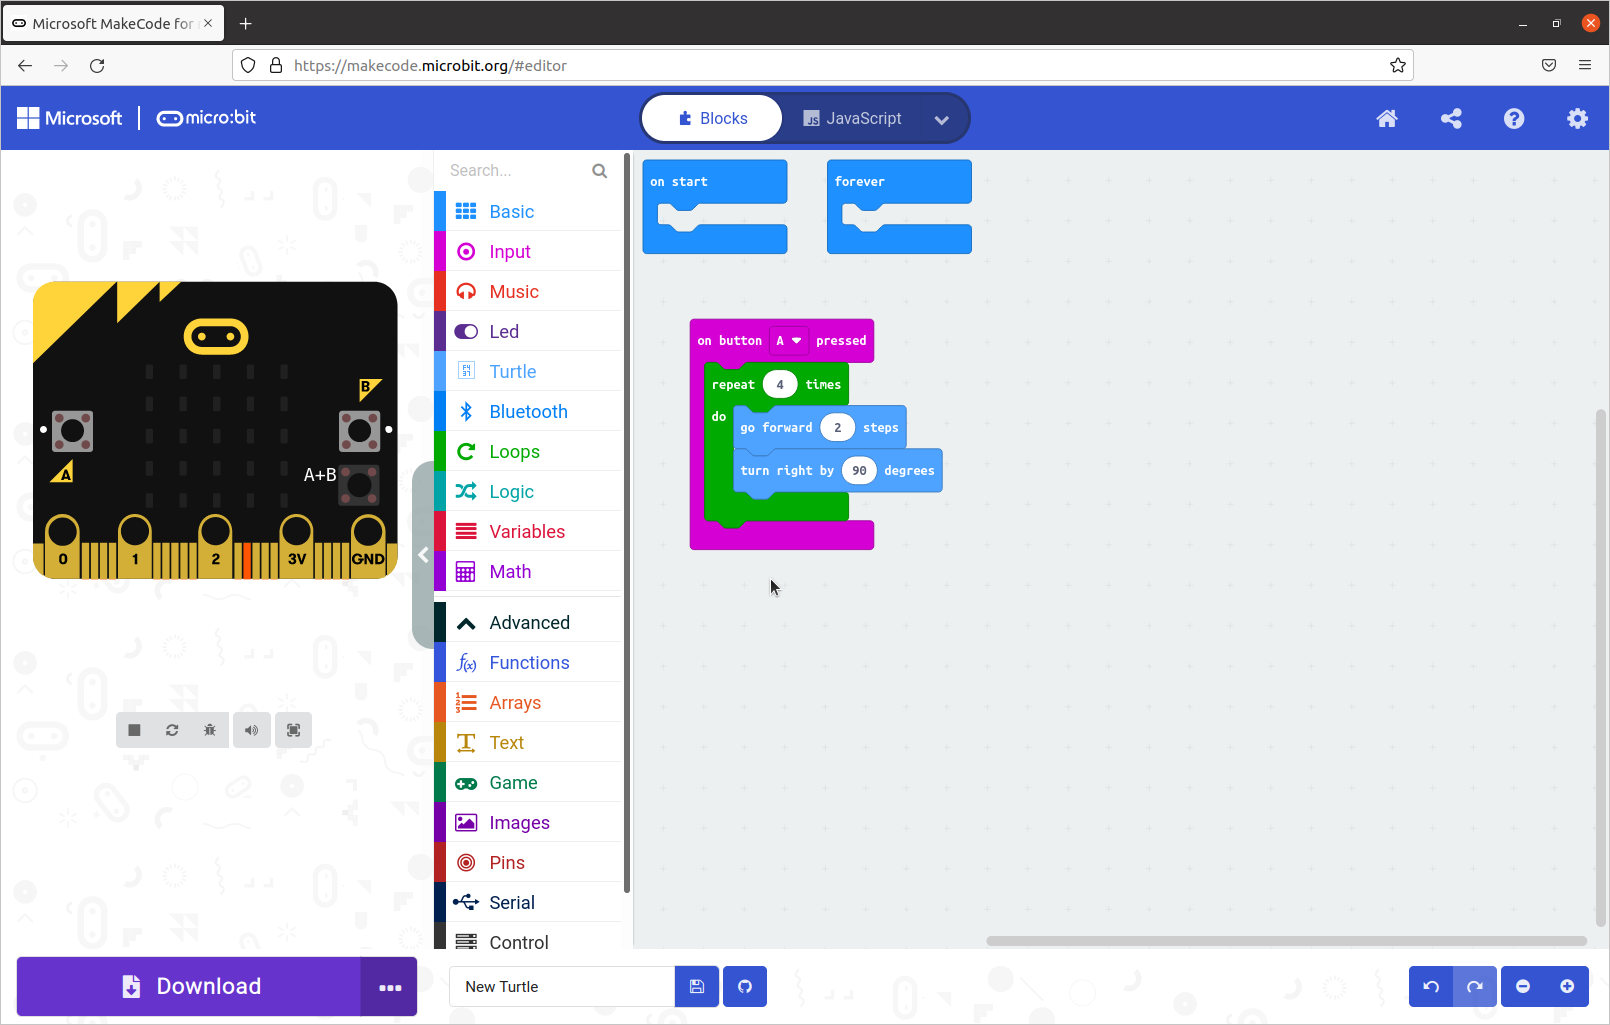
Flash the code by clicking “download”, connecting the micro:bit with a micro USB cable, and dragging/dropping the .hex file you downloaded onto the micro:bit. You should see the micro:bit’s LED indicator blink. When it is complete, you should see the “hi” mentioned earlier. Plug the micro:bit into the Turtle and the robot should move.